3-Hour RAID / NAS Recovery
Some have asked how a failed RAID array can be recovered in such a short 3-Hour time window. Briefly stated here are some of the factors that make such a quick recovery possible.
Knowledge — Hundreds of successful RAID recoveries performed remotely since 2011. It’s likely I’ve already worked on a case very similar to yours.
Experience — Over 30 years of experience as an IT Pro managing Windows and Linux servers in a corporate data center.
Automation — Custom software built to assist in the data recovery process automates much of the recovery work.
Remote Operation — No need to pack and ship your drives. I connect to you via the Internet so recovery work can begin very quickly.
Add it all together and a 3-Hour recovery is very much possible. Of course some cases present complexities which require more time to resolve. But in general 70% of the RAID cases I see are 3-Hour achievable.
Read MoreData Recovery, Worldwide

In operation since 2011 many clients have had their data recovered through my service. Most clients reside in the United States but I’ve had many clients from around the world as well. Performing data recovery, securely, over the Internet as I do provides an outstanding client value. And it does not matter if the client is down the street from my Boston office or half-way around the world I am able to provide the same level of high quality service to all clients.
And as far as I know no one, not even the big expensive data recovery companies, offers a similar type of on-line data recovery service. That is to say no one else has developed a data recovery CD that uses free technologies and a built in secure remote connectivity feature to make it possible to recover data from problematic hard drives and failed RAID / NAS arrays, remotely, anywhere in the world.
And certainly no one else sets their fees on a donation basis!
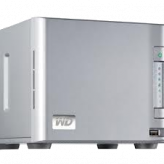
So if you are in need of a fast, affordable, high quality data recovery service that specializes in the remote recovery of desktop, laptop, and external USB drives plus NAS / RAID devices such as the WD ShareSpace, Buffalo Terastation, Seagate BlackArmor, Dell PowerEdge (PERC), HP Proliant (Smart Array), Netgear ReadyNAS, Lacie, Iomega, Synology, Thecus etc. then I invite you to contact me to discuss your case.
-Stephen Haran
Read MoreDo-It-Yourself Data Recovery
Updated for 2019…I have an all new DIY process built to automate data recovery from failed RAID/NAS devices. It’s called NASmatic and is very easy to use. It is based on the experience gained from years of NAS / RAID data recovery work. If you would like to give it a try read the NASmatic Quick Start Guide.
RAIDfinder is still operational but NASmatic is much easier and has many improvements. For RAIDfinder info read on. (Or scroll down for single drive DIY recovery info.)
R A I D f i n d e r
R A I D / N A S D a t a R e c o v e r y M a d e E a s y
RAIDfinder Quick Start:
- Connect your RAID member drives to SATA ports on a desktop computer.
- Download the RAIDfinder .iso file, size 312MB…FDR-5848G-RAIDfinder.iso
- Either burn the .iso to make a boot CD or make a bootable USB thumb drive with Rufus… http://rufus.ie/
- Boot the desktop computer with the CD or USB drive. Boot time is 3 to 5 minutes.
- From another computer open Windows Explorer and navigate to the network share RAIDfinder displays on screen, for example \\192.168.1.88
- Help RAIDfinder learn about your RAID. Edit the helper file in notepad and identify your RAID member drives.
- That’s it. Standby as RAIDfinder automatically begins a search for your RAID data
Introduction:
RAIDfinder automates the data recovery process for failed RAID0, RAID1, RAID5 and RAID6 storage devices. It’s based on the experience gained from hundreds of remote recovery cases performed over the last few years. RAIDfinder operates from a Debian Linux platform but requires zero Linux knowledge to use. All interaction with RAIDfinder is performed via a series of .txt files from a Windows network share.
Important Note: RAIDfinder works well on most NAS devices and other RAID arrays that use software RAID, where RAID meta-data is stored on each RAID member drive. Hardware RAID recovery is possible but requires manual operation.
Free to Use:
RAIDfinder is free for non-commercial use. For commercial use RAIDfinder is free to try but requires a key to access your recovered data.
Requirements:
A 64-bit computer with 2GB of memory and ideally with gigabit networking or USB-3 ports to copy recovered data at a high speed.
A wired network cable connected to a DHCP capable network with Internet accesss. Wireless will not work.
Safety:
RAIDfinder makes no changes to your RAID member drives. The drives are both write-protected and accessed read-only.
Operation:
Download the RAIDfinder .iso file and boot it on a computer with your RAID member drives attached.
Or if you are using image files, label the partition containing the images with the string “RAIDfinder” and it will be auto-mounted for use.
Optionally you may also attach a drive with a partition labeled “CopyDataHere” if you want RAIDfinder to copy recovered data.
After RAIDfinder boots it will display the path to a Windows network share.
Then simply go to a Windows computer and access the network share to see the info and action files and operating folders:
| Info Files | Description |
|---|---|
| info-start-here.txt | This file. |
| info-status.txt | Shows the current RAIDfinder state. Refresh often for updates. |
| info-smart.txt | Shows the S.M.A.R.T status of your drives, if possible. |
| info-system.txt | Shows info about the computer running RAIDfinder…including weather! |
| info-disk.txt | Shows both disk and partition views. Use this info before editing helper.txt. |
| Helper File | Description |
|---|---|
| helper-example.txt | Is an example of a RAIDfinder config file. Edit and rename to helper.txt to auto-launch a scan for RAID data. |
| Success File | Description |
|---|---|
| S_U_C_C_E_S_S.txt | Appears when RAIDfinder succeeds in recovering data. And contains instructions to proceed with the recovery. |
| Action Files | Description |
|---|---|
| action-request-key.txt | If RAIDfinder recovers your data enter your name and email to request a key. |
| action-copy-data.txt | Optional. Edit to launch a copy process of recovered data to a partition you’ve labeled: CopyDataHere |
| action-open-chat | Optional. Run to open a chat session with Stephen in your web browser. |
| action-allow-remote-help | Optional. Edit to permit Stephen to connect remotely to your RAIDfinder instance. |
| Folders | Description |
|---|---|
| RAIDfinder | Main control folder for RAIDfinder. |
| DataStructure | Appears when data is recovered. Contains a shadow copy of file and folder structure. Files are zero bytes. |
| Data | Appears when your key is approved. Contains your actual recovered data. See action-request-key.txt |
| DataCopied | Appears when data is copied to “CopyDataHere” partition. Contains data as it’s copied. See action-copy-data.txt |
| Spare | Will contain your image files from a partition labeled “RAIDfinder”, only if you are recovering from images. |
Limitations:
The current version supports 3, 4, 5 and 6 drive RAID sets using either RAID0, RAID1, RAID5 or RAID6. Support for larger RAID sets is planned.
File systems supported are Linux XFS BTRFS EXT2/3/4 with or without LVM and NTFS. Support for other file systems is planned.
Known Issues:
RAIDfinder can not handle chunk sizes smaller than 4096 bytes. This affects some Apple Mac RAID devices which use a 512 byte chunk.
RAID devices that use delayed parity are not supported such as HP Smart Array.
RAIDfinder can not recover Windows Dynamic disks but it is possible to recover with remote assistance.
DISCLAIMER:
The Software is provided “AS IS” and “WITH ALL FAULTS,” without warranty of any kind, including without limitation the warranties
of merchantability, fitness for a particular purpose and non-infringement. The Licensor (Stephen Haran) makes no warranty
that the Software is free of defects or is suitable for any particular purpose.
In no event shall the Licensor be responsible for loss or damages arising from the installation or use of the Software, including but not limited to
any indirect, punitive, special, incidental or consequential damages of any character including, without limitation, damages for loss of goodwill,
work stoppage, computer failure or malfunction, or any and all other commercial damages or losses. The entire risk as to the quality and performance
of the Software is borne by you. Should the Software prove defective, you and not the Licensor assume the entire cost of any service and repair.
………Below applies to single drive data recovery only…………
It’s possible to guide you through a do-it-yourself data recovery operation instead of using my remote data recovery service. That is to say you execute by hand all data recovery command operations but with my coaching. In this way you retain full control. And since there is no remote control of your computer using the do-it-yourself method is totally safe and secure. Note this DIY service applies only to single drive recovery due to the complexities of RAID recovery work.
I’ll give you all the steps you need to take from start to finish. This will include the software to use (all free open source software) and the commands to execute along the way. We will communicate via email, chat, and/or voice. Now this is not the quickest or most efficient option but it is the most secure option. It will take a bit more effort on your end but it is certainly workable and a great learning experience. So if you are extra cautious and prefer to perform a do-it-yourself data recovery without giving anyone control of your computer then complete the steps below to create your data recovery environment then shoot me an email and I’ll reply with further instructions.
Please note for any recovery attempt using software tools to be successful, at a minimum, your drive must be detected as present by your computer. For example, if you dropped your drive onto the floor and your computer no longer sees the drive then there is no software based data recovery solution that can help you.
Creating the DIY data recovery environment
First know that you will need two computers. Computer number one, the target computer, will act as a temporary data recovery workstation. It will have your failing hard drive connected to it. The second computer should be a standard Windows computer. We will use it as a communications console.
On the computer you have selected to use as your communications console install PuTTY. You will use PuTTY to remotely connect to the target computer.
https://putty.org/
All data recovery commands are executed from the Linux command line inside your PuTTY terminal window. So to get you familiar read up on Linux command line basics here’s one of many guides available on the net.
https://community.linuxmint.com/tutorial/view/100
Congratulations! You have just created your DIY data recovery environment and gained a little bit of Linux knowledge. Contact me for additional info and to arrange a time for us to begin the data recovery process.
Read More
Recent Comments