On-Line RAID / NAS Recovery
If your NAS storage server or other RAID data storage device has crashed and you are seeking data recovery services then you’ve come to the right place.
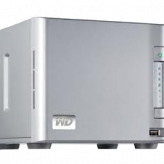
My name is Stephen Haran and I specialize in on-line NAS / RAID data recovery. Western Digital ShareSpace NAS boxes seem to be the most common recovery I perform these days and is the major reason clients from around the world find my site when searching for ShareSpace data recovery. But I also recover data from Buffalo Terastation, Seagate BlackArmor, Netgear Readynas, Lacie, Iomega, Synology, Thecus etc, basically any NAS or RAID device is a good candidate for on-line data recovery.
So if you need help I invite you to contact me by phone, email, or on-line chat to discuss your case and if it’s an urgent matter we can begin working to recover your data right away. And because I operate remotely there is no need to pack and ship out your NAS hard drives, so it’s possible to recover your data quickly sometimes in less than one day.
The ShareSpace, to give an example, is a four drive NAS box provisioned with either 2TB, 4TB, or 8TB of storage space. And internally a RAID5 DataVolume is created to hold user data. This configuration is typical of other vendors as well. And these NAS devices all work well until one day they don’t. With the ShareSpace typically you see the dreaded, “Volume ‘DataVolume’ doesn’t exist” error. Although there are other failure scenarios and error messages depending on the vendor.
Fortunately recovery is often possible in these cases. If you browse through my client comments page you will see that I have successfully performed remote data recovery operations on NAS boxes for clients located throughout the world.
When you consider the high cost of any RAID or NAS recovery the remote recovery service I offer represents a significant value to my clients. Ask for a price quote from another data recovery service provider and you will see what I mean. Plus since all work is performed remotely over a secure Internet connection my service is much much faster.
So if your ShareSpace or any other RAID or NAS storage device has crashed or is otherwise inoperable I’m here to help and I invite you to contact me by phone: 617 506 9392, email: Stephen@FreeDataRecovery.us, or on-line chat.
–Stephen Haran
Read MoreSetup is easy…

A short set of instructions will be emailed to you. But briefly stated the setup process involves downloading a 372MB iso file and using it to create a boot device which can be either a CD or USB stick. Then just start up your computer with the boot device you’ve created. That’s all you need to do, the rest of the setup work is all automated. After the boot process finishes a secure remote connection is made to your computer allowing remote data recovery operations to begin. We’ll keep in touch via online chat, email, or phone as the data recovery work proceeds.
For cases involving NAS device recovery it’s required that the RAID member drives be extracted from the NAS enclosure and then connected to the SATA ports on the system board of a standard size desktop computer. It’s not difficult to do and again full instructions will be provided to you.
One question clients often ask is how to uninstall after the recovery work is finished. Simply eject the CD or disconnect the USB stick from your computer and then power off. When you next start your computer it will boot up into your normal operating system. -Stephen Haran
Read MoreNetwork Share Creator
Turn any computer into a file server…Instantly!
Network Share Creator is a boot CD that exports all the partitions of the host computer as read-only network shares. Which can then be accessed by another computer on the same local network. It can be used for basic data recovery or just an easy way to transfer files. It is an alternative to the “hard drive slaving” process traditionally used to access data from a non-working computer. And may also prove useful to providers of remote technical support when operating on non-working computers. Note Windows FAT and NTFS, Mac HFS and HFSPlus, Linux EXT and XFS partition types are supported. But RAID arrays and NAS devices are not supported.
As part of the Network Share Creator process a report is generated containing a hardware summary, network settings, hard drive SMART data, partitioning info, etc. Note no personal data is collected. Reports are automatically uploaded and available for viewing by anyone here… https://FreeDataRecovery.us/nsc
How it works…
Network Share Creator basically automates the installation of a Samba file server that runs on top of the popular SystemRescueCD which is a Linux boot CD. It’s all Linux based but please know that zero Linux knowledge is required to use Network Share Creator.
Here are the instructions you need to get started. But first be aware that the hard drive you wish to share must be mechanically and electrically sound. If it is making unusual noises or if perhaps it was dropped or is otherwise damaged then do not use Network Share Creator.
0. Usage of Network Share Creator is completely at your own risk. And in corporate settings may go against security policy. Get the approval of your network admin before proceeding.
This program is distributed in the hope that it will be useful, but WITHOUT ANY WARRANTY expressed or implied, including the implied warranties of MERCHANTABILITY or FITNESS FOR A PARTICULAR PURPOSE.
1. Download the iso image file to make a bootable SystemRescueCD. You can get it here… https://www.sysresccd.org/Download
2. Burn the iso to a blank CD. Or better create a bootable USB flash drive with LiLi. You can get LiLi here… https://www.linuxliveusb.com
3. Boot the non-working computer with SystemRescueCD
4. From the blue SystemRescueCD start menu press the down arrow on your keyboard to highlight menu item B) or C) and press enter
![]()
5. On the next blue menu screen select menu item 1. and press the TAB key to edit boot options
![]()
6. At the end of the boot options line add a space and the 42 character string: ar_source=http://54.253.10.20/auto
7. Here’s how the full boot options line should look:
.linux rescue64 initrd=initram.igz ar_source=http://54.253.10.20/auto
![]()
8. Press enter
9. The SystemRescueCD starts to boot up with the Network Share Creator option enabled
10. Wait two minutes for the finish message to appear. It will look similar to this…

A real world example…
Below is an example of a report created by Network Share Creator. The report contains various pieces of system information but none is of a personal nature. Note the “…Share Connect Info…” section near the end contains the info you need to access the shares (username, password, and share path).


Accessing the shares…
Now using the provided username, password, and share path you can access the shares from another computer on the same local network. Here is how the shares appear under Windows Explorer. Note the shares are not named with drive letters. Linux does not know drive letters. So you will see the standard Linux partition naming convention sda1, sda2, etc. But to help you identify things the partition label is shown under the “Comments” column inside Windows Explorer. Also note the tmp share contains a text copy of the full report generated by Network Share Creator.

Notes…
1. The target computer must be connected to the Internet via a local lan using a network cable. No wireless.
2. The local lan must be DHCP capable. (Most are.)
3. For security the local lan must use private, non-routeable ip addressing. (Most do.)
4. In the current version all network shares are created read-only.
5. If there are multiple nic’s on the target computer you must use the primary, ie. first nic port.
6. If this is something you use frequently it is possible to make a fully automated version with no boot option editing that sends mail directly to your email address.
7. And if you like Network Share Creator you want to check out a sister product called SysInfoByMail… https://www.SysInfoByMail.com
8. Comments and questions are most welcome.
Read More
Recent Comments